|
|
|
Around the time I had completed the four elevation walls of the Main Hall, and had started to plan and design the East & West Hall sub-buildings, a fellow O-gauge hobbyist by the name of Mike Casatelli had recently completed his model of "Great" Central Terminal, or GCT.
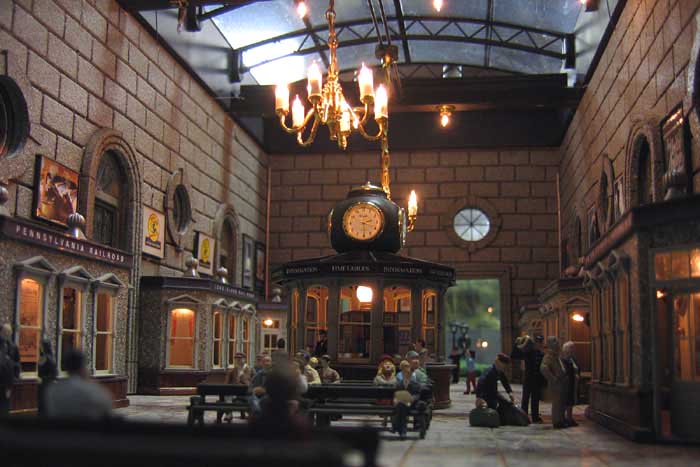
Mike is a fantastic modeler, and this can be seen in his work on his GCT model. Mike had designed and furnished his interior in a far greater and more detailed fashion than I had intended for my station. It is a work of art that truly must be seen to be believed. Mike made individual ticket counters, and lit them up with actual lamps, chandeliers, and accent lighting. His floor is made of individual tiles with real brass inlays in the mortar joints. The interior walls are fully decorated with maps, ads, artwork, and brick patterns. The ticket booths have real wooden floors in them. Mike's GCT station is truly inspirational, and it made me re-think how I might approach my interior altogether, and the barrel ceiling in particular.
|
|
|
Left: A shot of the interior of Mike's GCT.
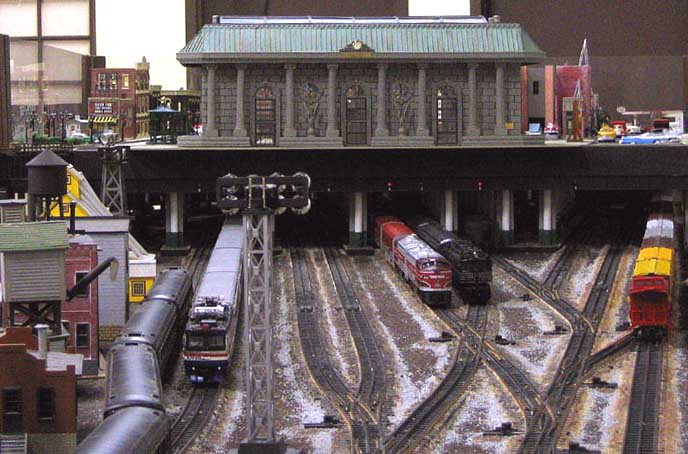
Right: Mike's GCT sits atop 11 tracks on the Central Operating Lines club layout in Ronkonkoma, NY.
Click here for some more photos of Mike's fabulous GCT.
|
Someone once described Mike as "a master artist and craftsman, whose medium of expression just happens to be O gauge trains." [paraphrasing]. Mike is much humbler about himself, and describes his GCT model as "a charicature" of the real GCT. I like this term, because I think it is a perfect adjective to describe much of what we hobbyists do in O-gauge railroading. The trains themselves have evolved into much more realistic renditions, and many of the buildings, structures, and scenery have moved more towards this end of the spectrum with the trains in recent years. But I think most of the projects we work on in O-gauge are still more toy-like and whimsical, and not so much sincere attempts at replicating reality in a painstaking and methodical way. I prefer this approach philosophically, because for me it fosters more creativity, and allows me to persue an expression rather than attempt to create an exact replica.
|
|
|
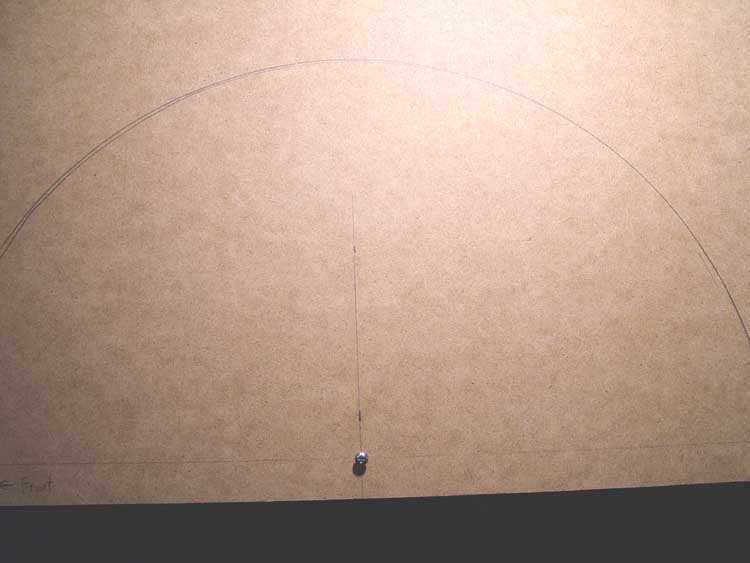
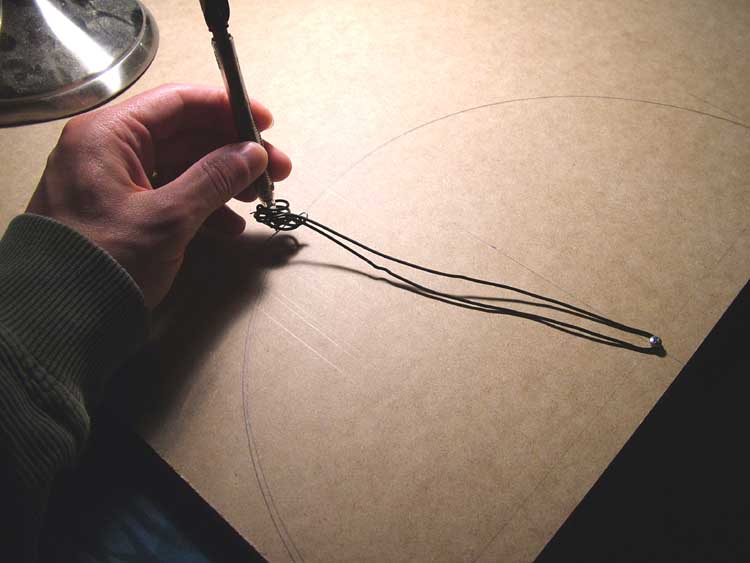
Tracing out the half-circles into the 1/2" MDF board.
|
At any rate, around this same time, in the Fall of 2005, Mike had completed his GCT model and had taken the trouble to thoroughly photograph it and publish these pictures on the OGR Forum. I was immediately mesmerized, particularly with his attention to detail on the interior.
My plans for WUS from the beginning did not include much in the way of interior detailing. In fact, my original thought was to make all the windows "foggy", or "frosted", so I wouldn't have to do any interior detailing at all. But Mike's GCT model, and his descriptions of all the fun he had making it, forced me to rethink my plans for the interior. So I became more ambitious (stupid?) and decided to take a crack at a true barrel-vault ceiling and roofline.
|
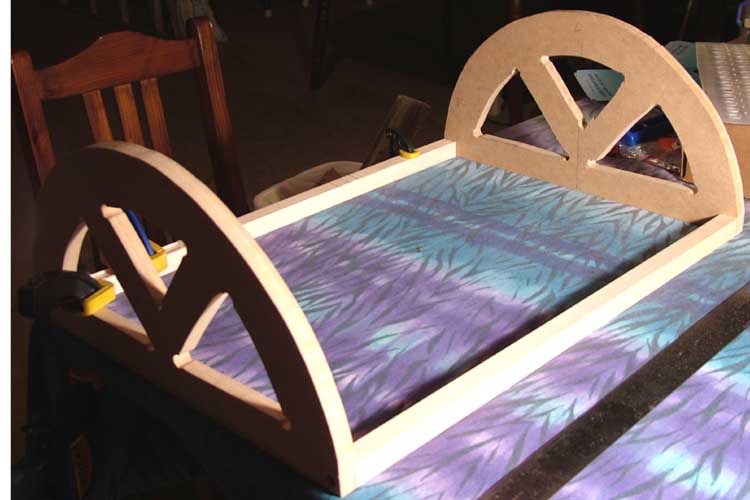
The two half-circle ends were then connected by two 3/4" square wooden dowels. The barrel vault frame was born!
|
I went through many phases of thought about how best to implement this. At first, I was convinced that I needed to find an existing product which was round with the diameter I needed (~13" - 14"). This is a very powerful scratch-building principle: finding existing products which closely resemble what you need, then modifying, detailing, and painting them into your structure. You would be surprised how effective (and inexpensive) this can be. It makes you look at trips to WalMart, Target, grocery stores, etc. in a whole different way. I found myself making special trips to The Container Store just to peruse the aisles looking for stuff I could kit-bash into things for my layout - buying cosmetics, makeup, dental, and other such products specifically for the retail containers and/or packaging they came in.
|
|
|
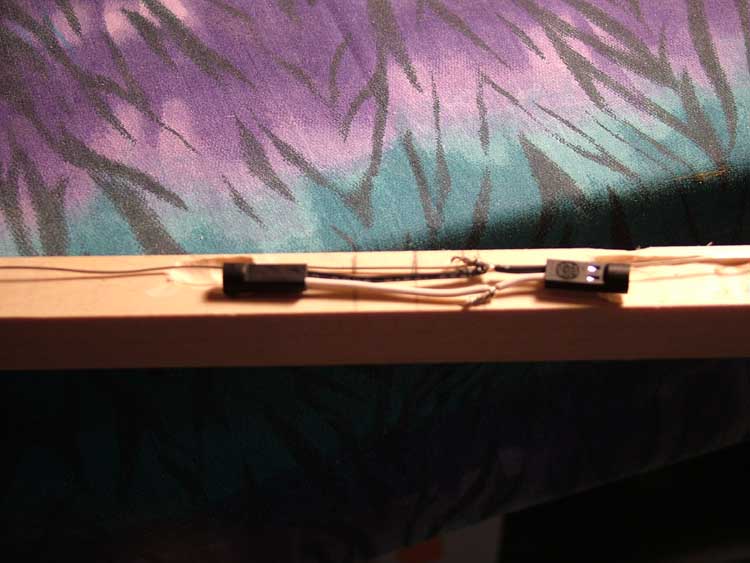
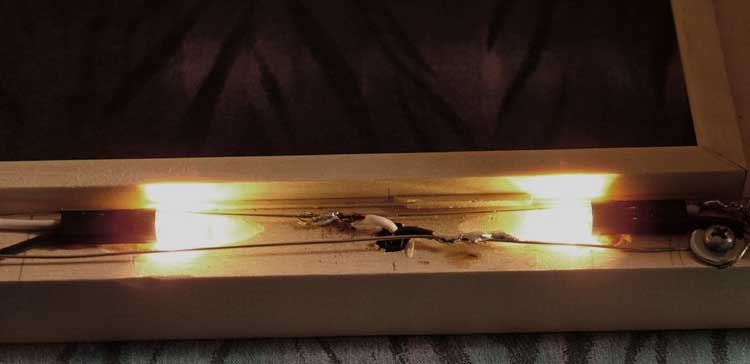
Some photos of the light socket soldering along the "shelf ledge".
|
My plan was to simply Dremel my way through such a product and effectively hack or kit-bash it into the basis for the roof structure. I found several options for this approach, including a couple of trash cans, a 14" diameter PVC pipe, and various industrial-grade basins and containers.
|
|
|
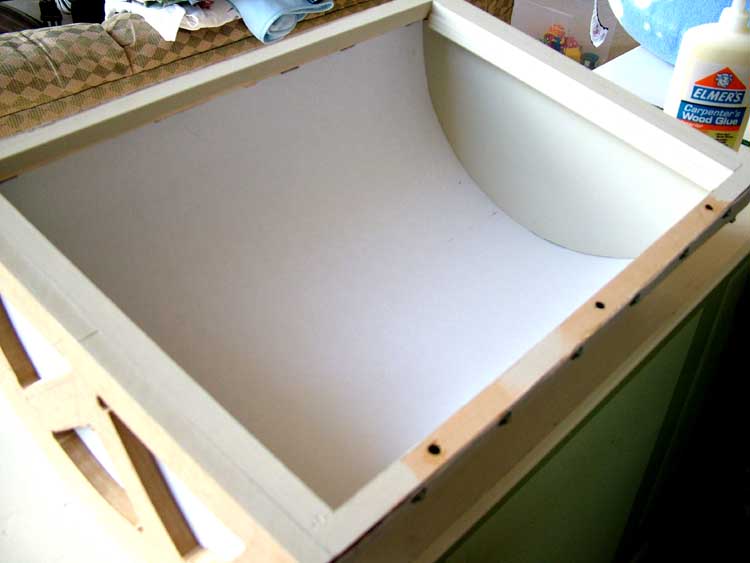
With the matteboard substrate glued in on one edge, and after a few "dry-runs" at bending it over the semi-circle guides,
the matteboard is already almost in the right shape to just fall into place. After all the soldering, etc. was completed,
the matteboard substrate was sealed over the two guides. The barrel shape now awaited a coffered ceiling, and a runed roof.
|
In the end, all of these proved too difficult (for me) to adequately modify. It is amazing how much of the "roundness" of a cylindrical object is dependent on one of the solid ends to be firmly attached. Take a trash can for instance: cut out the bottom, and suddenly your "rigid" cylinder of plastic is a very wobbly and unweildy thing. Cut this in half to try to get a half-barrel vault shape, and the whole thing very nearly flattens back out to a rectangle! (Ask me how I know this...)
But it was educational: I learned that it works both ways. You can take a rectangular sheet of material, and bend it over two semi-circle end-supports, and you get a surprisingly sound and sturdy half-barrel structure. Which is exactly what I ended up doing. The basis for the structure is two semi-circles of 1/2" MDF, which I simply jig-sawed. The sequential photos show best how I proceeded after that: I just glued and screwed a rectangular sheet of matteboard to the base of one side of the skeleton structure. When that completely cured, I then slowly bent the matteboard over the curve, and clamped it down to the other side. As with all things, I did a "dry run" of this first, to see how everything fit together, and to see how strong the final structure would be, and where the challenges would be in final assembly. Then I glued it down, and used screws - 24 along the round guides, and another eight on each of the lateral connector bars - to secure it in place while the adhesive cured.
|
|
|
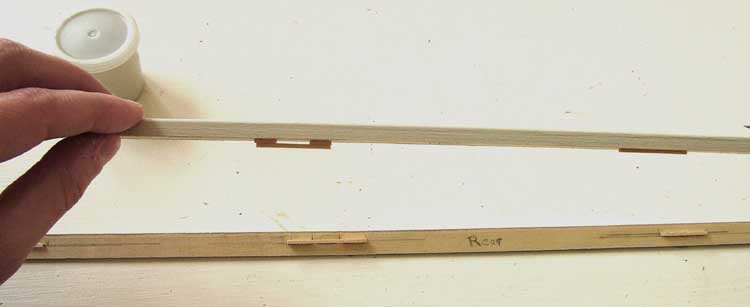
The two longer lengths of crown moulding were not permanently attached. Instead, little hoop-and-stud latches were made so that these pieces
could be removed to provide access to the sockets for bulb changes.
|
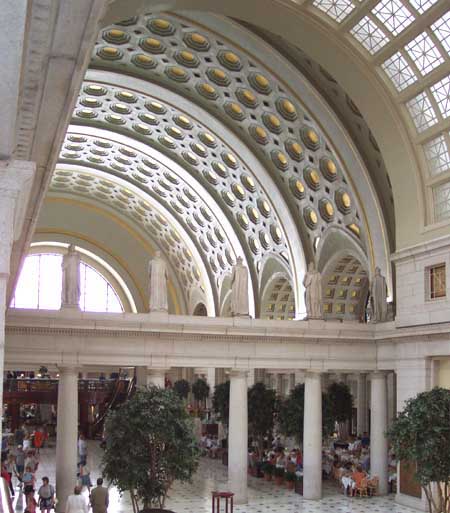
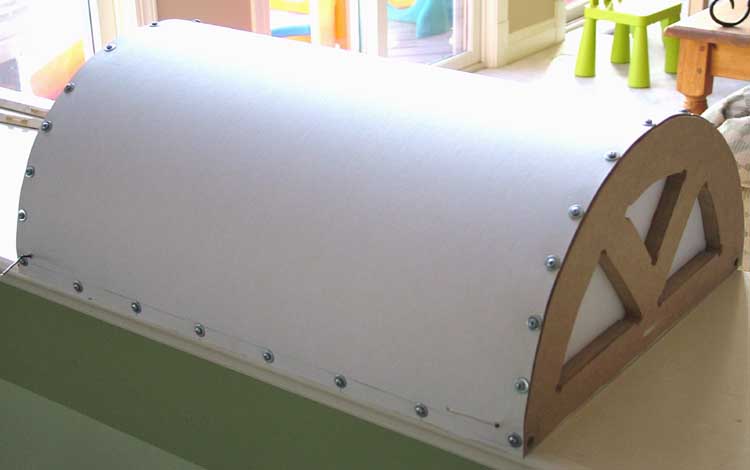
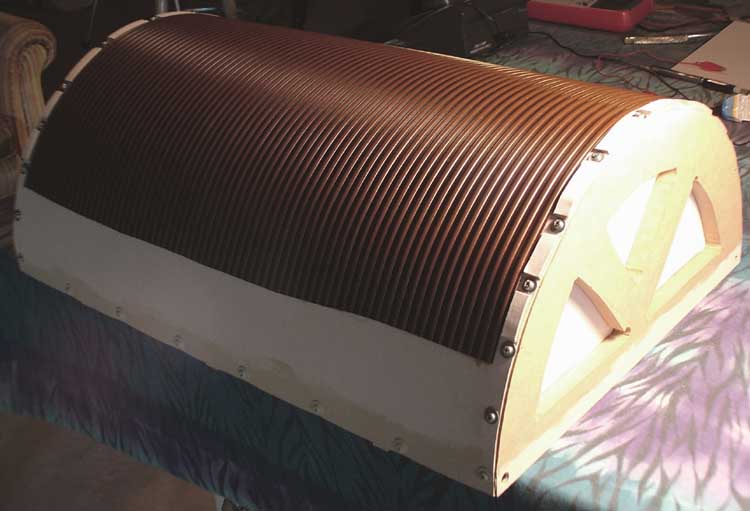
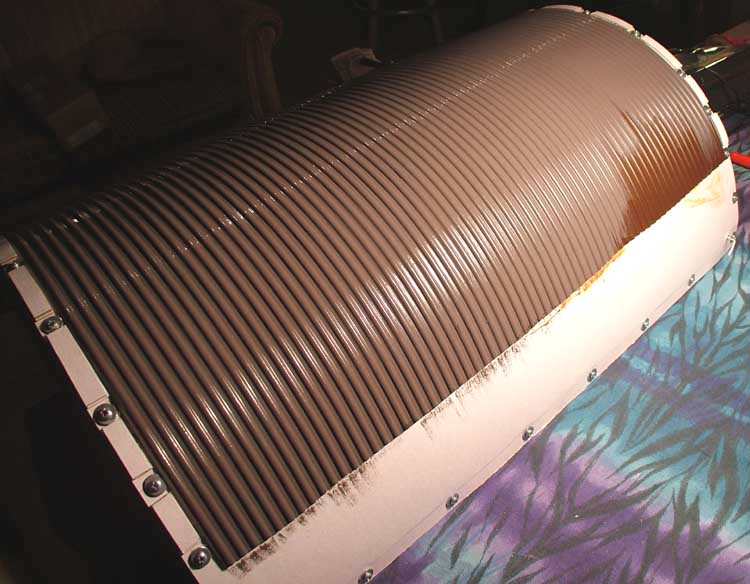
I stumbled across a material at Home Depot which was perfect for the exterior of the roof. It is a vinyl "safety" runner for a floor. It is a very flexible, quite tough material, and has the perfect parallel runes in it that Union Station has on top of its barrel roof. This was easy enough to cut and mount on top of the matteboard, and then I just painted it the annodized bronze color.
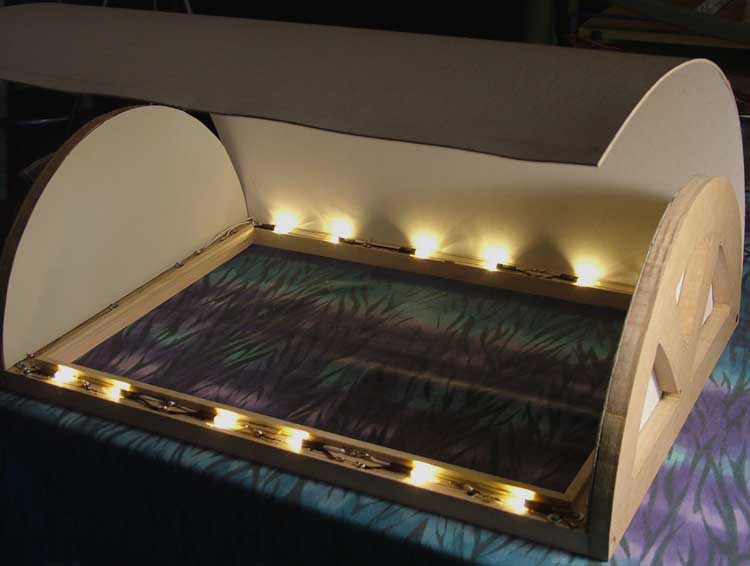
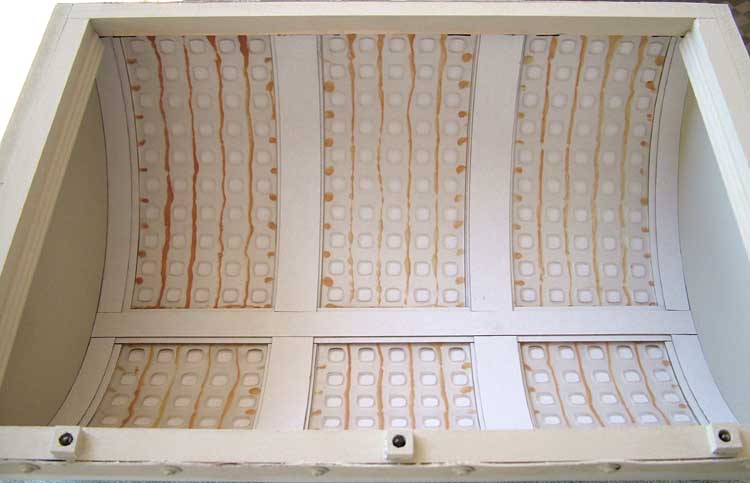
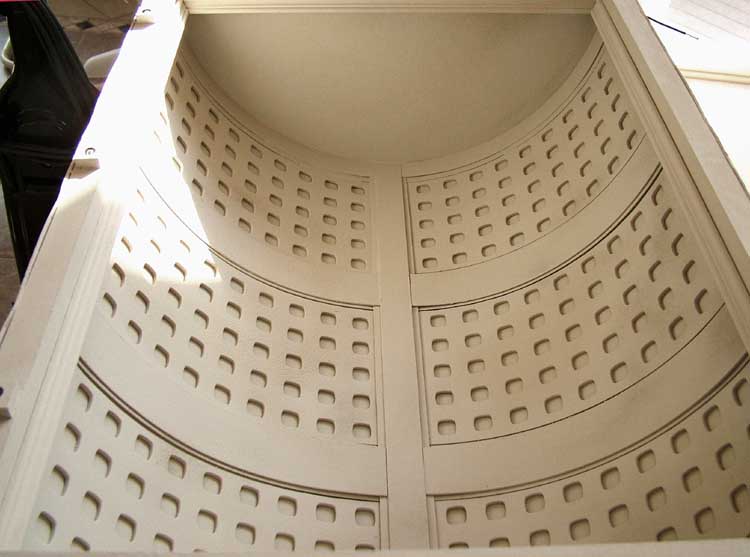
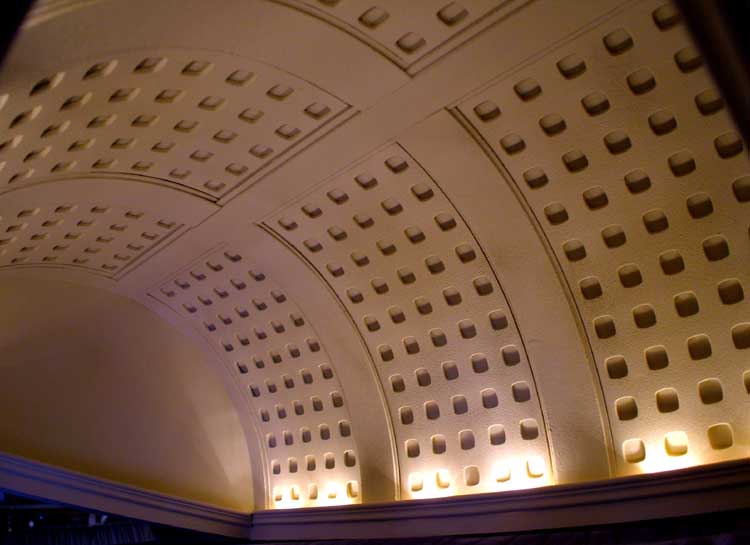
I ended up finding another material (again at Home Depot) which was a flexible plastique sheet with little rounded squares cut out of it. I felt these might make a nice set of coffers for the ceiling. The real Union Station ceiling has a very ornate set of coffers which I think would be a much more difficult task to replicate in detail for my model, so this was a nice compromise. This material was glued into the interior, and then the whole inside was painted the same sandstone color. It approximates the Union Station coffered ceiling in an impressionistic, stylized way. But I knew I wanted to at least attempt to "backlight" the ceiling, so I glued and soldered in a series of small lights on the "shelf" that the square dowels form at the bottom of the barrel structure. By recessing these lights somewhat into the wood, and then further hiding them with some crown moulding, the lights are not directly visible when viewing them from the floor, and they cast an upward glow on the round ceiling and help to highlight and accent the coffered texture.
|
|
|
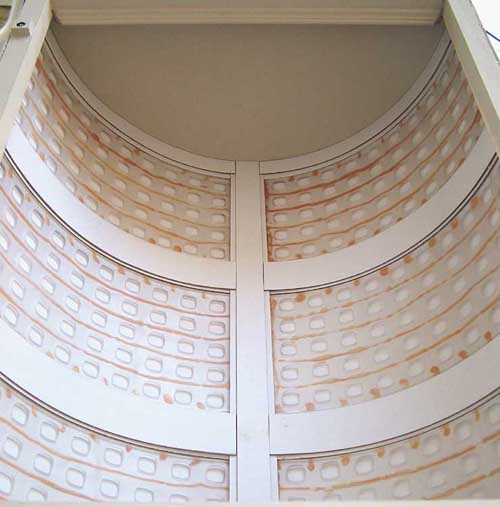
Just after the coffer material had been installed into the ceiling, but before the paint was applied.
|
The only real let-down in this very painstaking and labor-intensive endeavor is that in reality, this effect is not likely to be seen by anyone very easily. You can really only see in there by peering through the black grilles of the three portals over the doors of the front and back of the building. A camera is the best way to really see this.
But it does provide a soft, ambient light for the whole of the Main Hall, preventing viewers from seeing the harsh glare of randomly-placed bulbs to light up the inside. And it was worth it for the pictures alone!
|
|
|
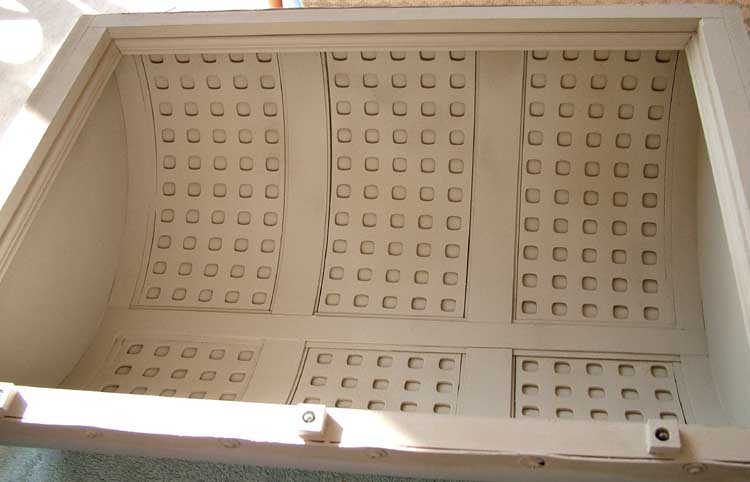
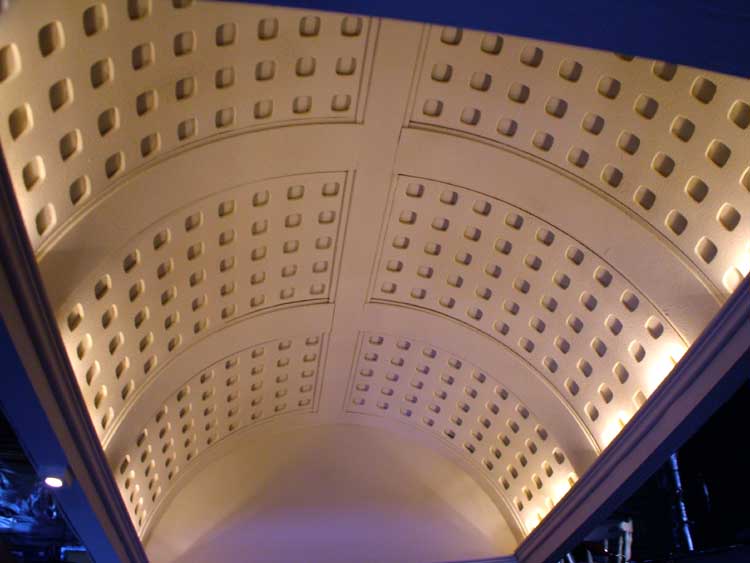
And after the paint was applied.
|
I had a fear that the weight of the runed "safety" tread on the exterior, and the rather heavy coffered material on the interior, would take a toll on the matteboard and cause it to sag in the middle. This has so far proved to be an unnecessary concern: the matteboard became very strong once fully bent and installed. There is something about the geometry of rounded surfaces that makes them much stronger when bent like that than they are when flat. This is easily demonstrated with a piece of regular paper. Hold it flat, and you can see how floppy and bendable it is. But bend it in one dimension - all the way into a semi-circle - and then try to bend it in the other direction. With a simple piece of paper, you can certainly crumple it, but you'll see how much harder it is to do now that it's curved. It becomes much stronger due to the arch you've formed with it.
|
|
|
Some photos of the first "light test" after all the paint had dried.
|
With the matteboard, it is really quite strong as a half-barrel. I don't think I'd ever test it by dropping it on the floor, but its strength has proven more than adequate to hold the interior and exterior detail materials.
The wiring is of course modular from the roof piece to the actual building. Unplugging a couple of quick-connect plugs allows the entire roof to be lifted straight out of the unit, where it can be flipped on it's back for servicing (replacing bulbs, etc.).
|
|
|
The exterior gets some runes, remarkably close in appearance to the real WUS roof. What a lucky find...
|
At this point, I had a fairly convincing model of the WUS Main Hall - complete with lighted statues on top of columns, a complex half-barrel ceiling and roof line, and recessed arch portals with individual barrel ceilings in them.
|
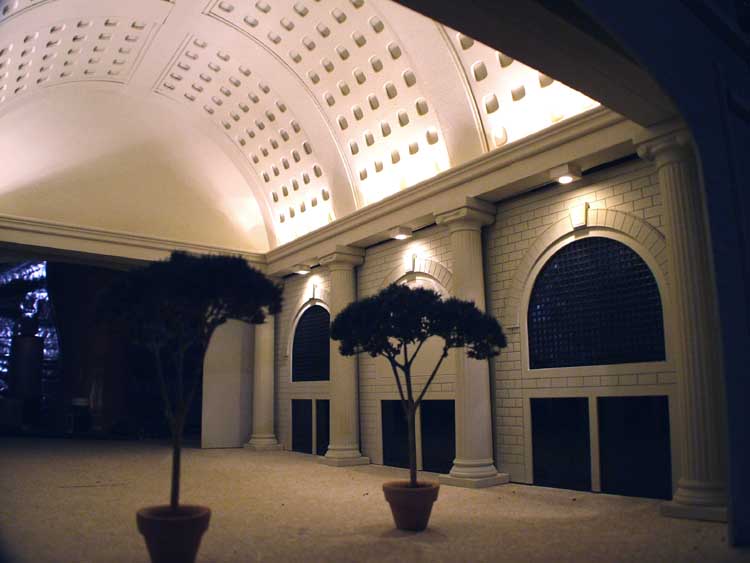
This seems to be everyone's favorite photo: a light test shortly after the interior facades were installed.
|
|